|
|
|
Neil Marsden - CASFX (Stage 1)
E-mail: n.e.marsden@bradford.ac.uk
Video Project Virtual Exercise
Images and Information EM0125M
So, here we are again, this time for the Images and Information video project. I've chosen to go above and beyond the call of duty and attempt to show my artistic ability as well as my ability to manipulate images, compress them into jpeg format, write HTML, use FTP etc. etc. Content creation, I suppose. What happens when you need something more on your web site than a photo you scanned or took with a digital, or a frame-capture from an mpeg. Photoshop is a powerful tool - it should be, there probably isn't a design studio in the country. Sometimes you need to create content and don't have any option but to start with a blank page.
So this is a basic tutorial on how to create content or in this case, how to draw and paint an image in Photoshop. After you've learned from this tutorial you will have an image that you can use as a design element on your web page. However, I'm going to work on a second tutorial where you'll learn how to turn your design element into a piece of full-colour artwork. Anyway, on with the show.
PHOTOSHOP TUTORIAL - PART 1: How to make your own design element
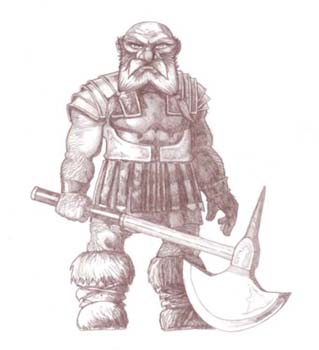 |
1.
First start with a pencil sketch on paper, it only has to be a rough sketch. (Drawing in Photoshop is very difficult with a mouse.) Import the sketch into Photoshop and make sure the Mode is set to RGB. Usually the Image Size should be should be a minimum of 1000x1000 pixels to allow you to work. Adjust the Brightness/Contrast to clean up the image. Use Hue/Saturation to give the grey pencil lines a more rusted colour (i.e., sepia). Save a Copy of the Photoshop
Document (.psd). |
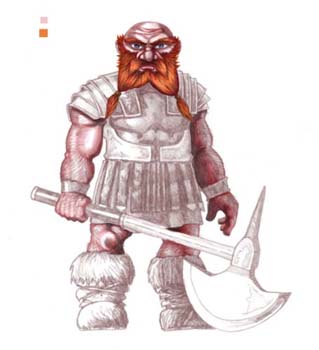 |
2.
Create New Layer, set it to Multiply and 80% opacity. You will be able to see the sketch through this layer, and on this layer you will do most of your painting. Use the Paintbrush at 100% and then at 50% for the shading. For hair/fur etc. Burn Shadow and Dodge Highlight are useful tools. To choose the colours for shading use a darker tone of the base colour, or if you can add a different colour for more texture. Of course, this all depends on the lighting and background colours. Save a Copy of the Photoshop
Document. |
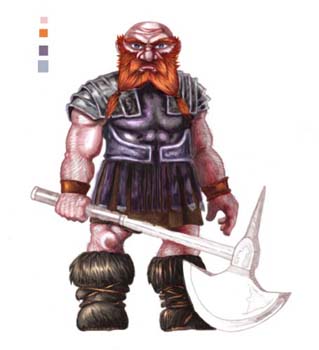 |
3.
Continue with your painting. Geometric shapes that require straight edges, angles etc., should be left until you've finished with the painting the figure. After you've finished painting, define the image, tighten up the edges. Use Zoom, Eraser to clean the edges and a small to medium brush at 10% to 30% for highlights and shadows. Use a small (natural) brush with Smudge set at 75% to blend the colours, or with hair/fur etc., try Smudge at 90%. Save a Copy of the Photoshop
Document.
|
 |
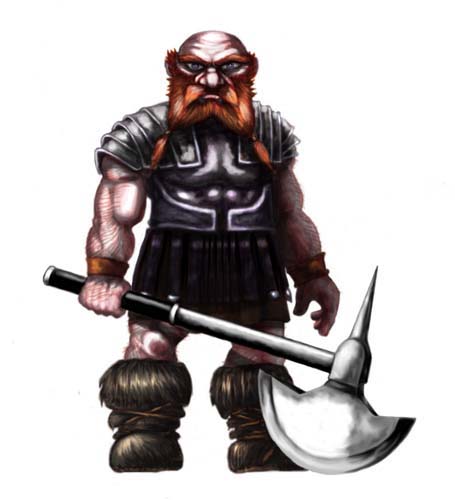
4. Now create a New Layer, Multiply at 100%. Onto this you will paint any shadow-casting effects, depending on the lighting and background, of course. Use a medium brush at between 20% to 50% for shadow-casting.. Create another New Layer, Normal at 100% for your straight lines and angles (e.g., weapon). Use Line, Pencil and a mid-tone to draw the weapon, then to soften the edges apply a Gaussian Blur Filter to the layer. In this example a contrast of dark and light tones were used with a heavy brush (95%) and some Dodge and Burn for effect. Save a Copy of the Photoshop
Document. |
 |
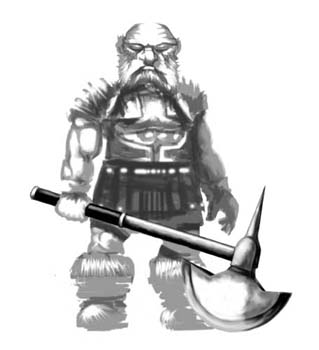
5. Save a Copy of the Photoshop Document (.psd), then Remove the layer with the sketch and Merge the other layers - but do NOT Flatten the image. Tighten up the image with Zoom, Eraser, and use Smudge to blend any glitches caused by merging the layers. Now Save As a Photoshop Document with a different File name and Save a Copy. After Flatten Image and then Adjust Image Size to your requirements. Save As either JPEG (.jpg) or TIFF (.tif) format, or both. Use level 8 (High) Compression and Baseline Standard for the JPEG, but don't use LZW Compression for the TIFF - this will be your master copy. |
Well done. There is a learning curve to working with Photoshop (and you will make some BIG mistakes), but once you get used to it there's no turning back.
When working in Photoshop (or even Flash to a certain extent), you have to remember the maxim -
No retreat, no surrender
Don't let it get to you, because the results you can achieve are well worth it.
Coming sooner rather than later...
Photoshop Tutorial - Part 2: How to turn your design element into a piece of full-colour artwork
Flash Tutorial: How to make your own professional-looking logo